Numenorean Arrow
From BelegarthWiki
| Line 16: | Line 16: | ||
Image:Arrow005.jpg|Step #5. Criss-Cross the tape so it will not pop out from the sides, some people add two more pieces of tape along the diagonals to really keep the penny from ever moving. You now have succefuly pennied an arrow. This is a requirement for all arrows. | Image:Arrow005.jpg|Step #5. Criss-Cross the tape so it will not pop out from the sides, some people add two more pieces of tape along the diagonals to really keep the penny from ever moving. You now have succefuly pennied an arrow. This is a requirement for all arrows. | ||
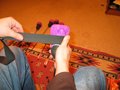
Image:Arrow006.jpg|Step #6. Next we have 3 pieces of foam, The first is a piece of [[Polyethyline]] 2 inches thick. Next is a 1/2 inch of grey foam that is much like common blue foam, and the last is a 1/2 inch piece of [[Polyethyline]]. You could of course use nothing but blue foam. | Image:Arrow006.jpg|Step #6. Next we have 3 pieces of foam, The first is a piece of [[Polyethyline]] 2 inches thick. Next is a 1/2 inch of grey foam that is much like common blue foam, and the last is a 1/2 inch piece of [[Polyethyline]]. You could of course use nothing but blue foam. | ||
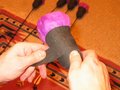
| − | Image:Arrow007.jpg|Step #7. the first piece the [[ | + | Image:Arrow007.jpg|Step #7. the first piece the [[Polyethylene]] 2 inches thick has a hole drilled into it with a two step proccess one drill is the diameter of the aroww shaft all the way through the center, the second is the diameter of a penny the depth of the ducktape on an arrow. slip this piece down the arrow shafter from the [[fletchings]] larger diameter first, be careful to not tear the foam with the fletchings. |
Image:Arrow008.jpg|Step #8. This step is a pre-assembly check. It also gives you an idea of how the base of the head is assembled. | Image:Arrow008.jpg|Step #8. This step is a pre-assembly check. It also gives you an idea of how the base of the head is assembled. | ||
Image:Arrow009.jpg|Step #9. Pre-heat a [[hot glue gun]]. | Image:Arrow009.jpg|Step #9. Pre-heat a [[hot glue gun]]. | ||
Revision as of 04:44, 11 February 2006
How to Build a Numenorean Arrow
Copyleft Gregg Larson (Kegg of Numenor) and Belegarth Medieval Combat Society
The art of arrow construction has evolved over the decades. What follows are instructions for the arrow commonly referred to as the Numenorean arrow as designed by Kegg of Numenor. The idea for many of its features were derived from an arrow design by Granifar of Pentwyvern.

Step #2. Cut ducktape into thirds(or half) and wrap the tape layering it to make the end of the tape cover the tip of the arrow, until the thickness of the arrow tip and tape are a litter larger that of the diameter of a penny.
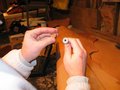
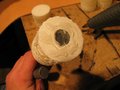
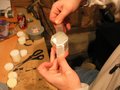
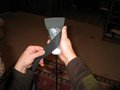
Step #3. Check to make sure the penny is ready slightly smaller than the diameter
Step #4. Put the penny on the tip of the arrow and use some more of that split ducktape to make sure it stays there.
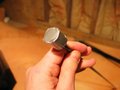
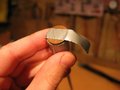
Step #5. Criss-Cross the tape so it will not pop out from the sides, some people add two more pieces of tape along the diagonals to really keep the penny from ever moving. You now have succefuly pennied an arrow. This is a requirement for all arrows.
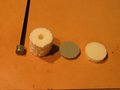
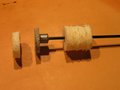
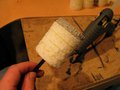
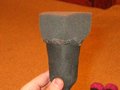
Step #6. Next we have 3 pieces of foam, The first is a piece of Polyethyline 2 inches thick. Next is a 1/2 inch of grey foam that is much like common blue foam, and the last is a 1/2 inch piece of Polyethyline. You could of course use nothing but blue foam.
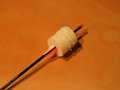
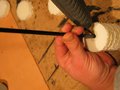
Step #7. the first piece the Polyethylene 2 inches thick has a hole drilled into it with a two step proccess one drill is the diameter of the aroww shaft all the way through the center, the second is the diameter of a penny the depth of the ducktape on an arrow. slip this piece down the arrow shafter from the fletchings larger diameter first, be careful to not tear the foam with the fletchings.
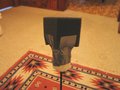
Step #8. This step is a pre-assembly check. It also gives you an idea of how the base of the head is assembled.
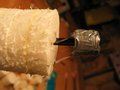
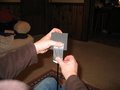
Step #9. Pre-heat a hot glue gun.
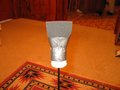
Step #10. Apply hot glue to the duck tape and penny end of the arrow as well as the hole that it fits into the polyethyline
Step #11. Pull the piece of polyethyline down to the end of the shaft flush with the tip of the arrow and apply a layer of hot glue to the end of the arrow.
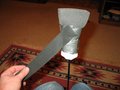
Step #12. Quickly & carefuly apply the grey foam end to the hot glue, make sure everything lines up.
Step #13. Apply some hot glue to the base of the head.
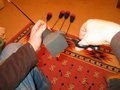
Step #14. Cut some pieces of 3 to 4 inch strips of strapping tape.
Step #15. Affix the final piece of polyethyline onto the head of the arrow.

Step #16. Trim the base of the arrow head so it tapers on the rear side of the head. And wrap the front with a piece of duck tape around the diameter of the end of the arrow head.
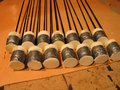
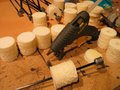
Step #17. Often times someone will build many arrows at once. This is a good place to stop when mass producing a set of arrows.

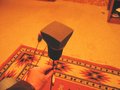
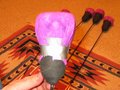
Step #18. The next piece of the head is a block of dense Open cell foam, commonly called Computer Foam for the soft head of the arrow.
Step #19. Place the 3" square of foam on the end of the arrow, make sure it is center. Apply a pice of 3" duck tape half on the open cell foam half on the end of the arrow.
Step #20. Do the same to the opposite side
Step #21. Then the other 2 of the 4 sides of the arrow head, add more pieces of 3" duck tape.
Step #22. Put 3" strips of ducktape on the corners as well.
Step #23. Using Cloth tape tape the head down.
Step #24. Use a criss-cross pattern to help secure the head from shifting.
Step #25. Apply some more cloth tape covering all the exposed polyethyline at the base of the head. This will help protect it from the elements.
Step #26. Try to cover all the ducktape.
Step #27. If you can see duck tape below the tape, add an extra layer.
Step #28. Good Job ! Your almost done!
Step #29. You should now have what is considered a passing arrow!
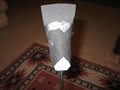
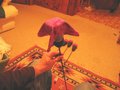
Step #30. Notice how the open cell foam is exposed. In many groups this is not allowed. And if everyone left their arrows like this they would be hard to identify.
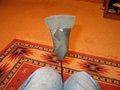
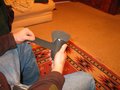
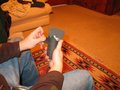
Step #31. Before adding a cover it is probably a good time to test the arrow to make sure it is safe to fire. You can do this by hitting the head of the arrow. (If this is your first arrow, have an experienced weapons checker do the check
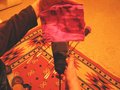
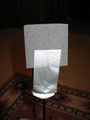
Step #32. The arrow cover is about 5 inches square and can be any color cloth.
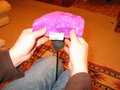
Step #33. Start by centering the fabric and taping down the edges of the cloth to the head of the arrow using 1/3 of a strip of duck tape.
Step #34. Do all four edges.
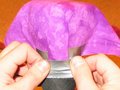
Step #35. Tape down the corners with 1/3 of a strip of duck tape, after carefuly folding them.
Step #36. Wrap the entire cover down with one 1/3 of a strip of duck tape all the way around the arrow.
Step #37. Cover the duck tape with more cloth tape to protect the arrow head.
Step #38. And that is the last step to adding a cover to your new arrow.


==Disclamer== A Belegarth legal arrow should be able to be shot from a recurve or longbow (35# at 28 inch draw) into the face of an opponent at a distance of 15 feet without causing harm. This is an exacting standard to which arrows should be constructed to. Arrows should be shot tested by an experience marshal before any arrow is used in combat. Remember while properly constructed arrow heads are safe for Belegarth combat, an arrows nock is still capable of causing serious injury. This work is distributed in the hope that it will be useful, but WITHOUT ANY WARRANTY; without even the implied warranty of MERCHANTABILITY or FITNESS FOR A PARTICULAR PURPOSE. See the GNU General Public License for more details.
Original contents URL location: