Galya's Simple Guide to Editing the Wiki
Purpose
To help new users who are otherwise unfamiliar with editing Wiki-like pages and don't want to have to dig through the extensive help section to answer a simple question.
- Note: This page only includes very basic knowledge and codes that I use all the time. If you are looking to do something fancier, it would be best to read through the Help link above.
How To Get Started
1. To create a page, enter the EXACT name of the page you wish to create in the search bar. (This includes spelling and capitalization, because whatever you enter is what you will get.) It will tell you the page doesn't exist, and then you click on "create this page" and it will open an edit box.
2. Enter your desired content. Just be warned that derogatory content will not be tolerated.
- For quick-to-use code templates for various types of pages, go here
Some Helpful Tips
- If you wish to link another existing page to your new page, simply puts double brackets around it, like so: [[Main Page]] .
- Also, if you want to link something that it isn't the EXACT name of the page, you don't have to edit your content. Inside the brackets, simply put the name of the page first, then a | (located somewhere on the right side of your keyboard) and whatever you want it to say, followed by the closing brackets. Example: [[New Realm Starter Kit|Helpful Info]]
- To break off your text into another line, either hit your "enter" or "return" button twice, or insert the letters "br" between <>, as so <br>, at the end of the line.
- To make something bold, put three apostrophes around it, and use two for italics; Bold italics requires five. FYI: Quotation marks (") are not the same thing as 2 apostrophes.
- After you have entered your text, you will want to add a category to your page, especially if it is about a person, realm or unit. This will automatically add your page to these categories and also make it easier for others to find it. To do so, just type "Category:" and whichever category you need anywhere in the page. There are many, many categories already, so it's usually best to just use the ones currently in existence rather than making your own.
- Category tags are very important. Don't overuse them, but be sure to include at least [[Category:People]], [[Category:Realms]], or [[Category:Units]] when needed.
- Important! - You may preview your page while you are editing, there is no need to edit the page dozens of times just to try and get it right. Simply click on the "show preview" button next to the "save page" button at the bottom of the page. It will save the admins a lot of headache if you do this. Please use it.
- Accidents do happen. If you find a typo (for example), please click the "minor edit" button, which is directly above "Save page."
How to Add/Edit a Picture
While it is technically possible to copy/paste a link from an online picture storage site into your new page, those images cannot be moved nor formatted. Instead, it is advisable to upload your images to geddon.org directly.
- To do so, click the "Upload File" link on the lower left side of the page, under the Toolbox heading. This will take you to the upload page.
- If the source filename is long or has lots of random numbers/letters in it, choosing a more specific destination filename will make your life easier when it comes to using the picture in your page.
- When adding the picture to a page, use the code [[Image:whatever you named it.jpg]]. You MUST enter the name exactly, or else it will not work. And yes, there is a difference between .jpg and .JPG. Sometimes it's best to just copy/paste the name if it's too long or complicated to remember. Here is the code for the picture used below: [[Image:Horde.gif]]
- Now comes the fun part! So you've got the basic image, right? If you want it to be on the left side instead of the right, use another divider (|) after the image name and put "left".
Example:

Code is [[Image:Horde.gif|left]]. You can also put "right" or "center", and the same will happen.
What if the picture is too big? Use the word "thumb" after the divider to shrink your picture to a thumbnail-ish size instead.
Example:

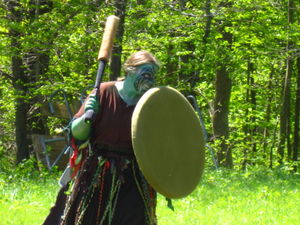
<----That is [[Image:Galya.jpg|thumb|left]]
If that's just too small for you, adding a specific number of pixels can get the picture to your ideal size.

This one is at 250px. ----------------------------------------->
Also, while using the "thumb" function, you can add a caption beneath the picture simply by adding another divider and entering your text just before the closing brackets. See the example at right. Using the word "frame" instead will do the same thing without shrinking the picture.
How to Redirect/Move/Delete a Page
Redirects:
The most common use for a redirect function is User pages. It's generally a good idea to put your personal information on the page with your name on it, and leave the Talk:You page for contributions and the like. Example: User:Galya
But redirects are useful if there are multiple potential names or spellings for your new page. An example would be the page Goblins. Despite the difference, both Goblin and Goblyn still link to that page. To redirect a page to another one, just type #REDIRECT: [[Page Name]] at the top of the page and it will instantly go there instead.
Moving a Page:
This is easy. There's a button at the top of every page along with "edit" and "history". Click it, fill in the new page name and bam! Done.
Deleting a Page:
Only admins have the ability to delete pages, but if you want something deleted, there are two ways to let the admins know.
- Blank the page and leave "Please delete" either in the text or the edit comment box
- Add the Category for deletion to the page, as shown here: [[Category:Delete]]
Additional Help
- If you need additional help, please consult the editing reference guide.
- Any questions, feel free to ask me on my Talk page or on the Belegarth boards. You can also examine other people's pages to see how they did things. Good luck! ~Galya
