Constructing a Strap Shield
Originally taken from Eriador's Construction Site
Materials Needed
- 3/8" to 3/4" plywood
- Leather straps or synthetic strapping
- 1/4" by 1" bolts; washers and nuts (Note: the use of tee-nuts is preferred here. A simple nut on the face of the shield will eventually start to turn within the foam, making a complete deconstruct necessary. Tee-nuts alleviate this problem.)
- Blue Camp Pad
- DAP Contact Cement
- Duct Tape
Instructions
1. Cut your plywood into the size/shape you want. Use 3/8-1/2" plywood for shields with dimensions 2' x 2' or under. Use 3/4" for large tower shields.

2. Find the center of your shield. Mark a rectangle where you want your arm to go. Mark where the open palm of your hand is and where your inner forearm will be.
3. Glue a rectangle of foam where your arm will go.

4. Measure out 1.5" from your marked points of where your hand and forearm will go. Drill a 1/4" hole in each point.
5. Cut a strap of leather about 10" x 1.5". Cut another strap of leather or seat belt about 2.5" wide by the length that will go around your upper forearm and be bolted to your shield.

6. Drill holes in the center of each end of your leather straps. For seat belt, punch a hole with a nail then expand it with scissors.
7. Put a 1/4" by 1" bolt down through a washer, your strap, and your plywood core from the back side (or see alternatives). Secure on the front side with a nut. You should see the flat head of the bolt on the back side of your shield.

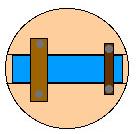
8. Flip your shield over to the front side. Place the board or template you used to cut the board down on a roll of blue foam. Trace the shape onto the blue foam 3 times. With larger shields you will have to use multiple rolls because 20" is not wide enough.
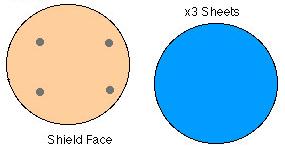
9. Put duct tape over the bolts to keep them from tearing into your foam later. Glue the 3 layers of blue foam onto your shield face one at a time with DAP.
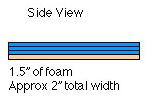
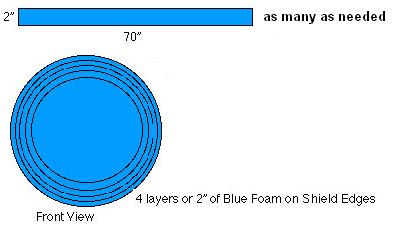
10. Cut strips of blue foam 2" wide times as long as your roll of foam (probably about 70") until you will have enough to wrap the edges of your shield 4 times. Glue strips around the outside edge of your shield squeezing each layer into place and rolling it firmly against the ground. When finished with the edges your shield should look like this from the front.
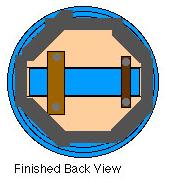
11. Finish by duct taping the back shield edges to your core. You can also do this to the face of your shield. This should increase shield edge stability.
Alternative Methods and Materials
- Instead of having the head of the bolt face the back of the shield with the nut buried under foam on the face, many prefer to have the head of the bolt on the face of the shield with the nut on the back. This allows the straps to be replace much easier if they wear out or need adjusting.
- Instead of using a nut at all, some prefer to use T-nuts, which are pounded into the wood from the face side of the shield. They allow the head of the bolt to face the back side of the shield while still allowing the straps to be easily removed in the future.
- For a dramatically lighter strapped shield, Tech-ply can be used in place of regular plywood.
- Carpet tape and Spray Glue can also be used effectively in place of DAP.
- A similar method of padding can be used on strap shields using a (sufficiently rigid) Saucer Sled as a core. See Concave Shield.
Alternative Designs
- Open cell sandwhich - in this design, a 1" thick (or greater) layer of high-density open-cell foam is used in place of the next-to-last layer on both the face and the edge. Put the layers on in the following order:
- One layer of closed cell on the face
- Two layers of closed cell on the edge
- One layer of open cell on the face
- One layer of open cell on the edge
- One layer of closed cell on the face
- One layer of closed cell on the edge
- This creates a much softer shield which is not much thicker or heavier than the standard construction. Spray glue should be used when connecting open-cell foam to other layers.
- Open cell face - in this design, the outermost layer of foam on the face and edges is a 2" thick or greater sheet of high-quality, high-density open cell foam. This can create the softest shields, but requires very high quality foam or a very thick shield.
- Coreless - while coreless shields are generally used as punch shields, they can be used as straps (or bucklers) as well. See Constructing a Punch Shield for more information on coreless shields.
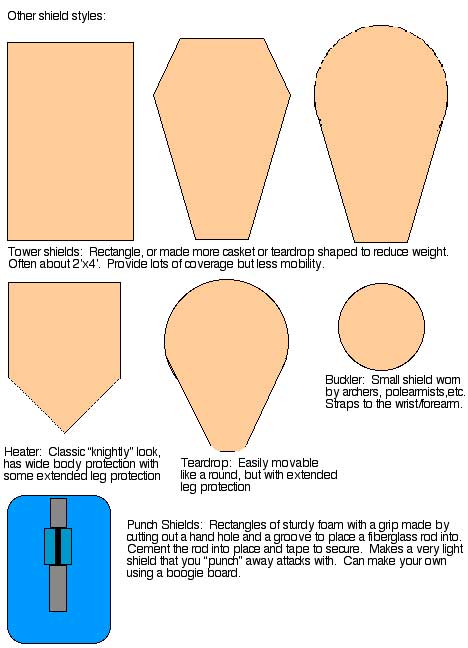
Other Shield Styles
